Table of Contents
Key Takeaways
- Identify your undertone (warm, cool, or neutral) using the vein test and jewelry test before selecting a foundation shade
- Choose foundation formula based on your skin type: liquid for dry, powder for oily, cream for combination, and stick for normal skin
- Always test foundation on your jawline in natural light and let it oxidize for 60 seconds before committing to a shade
- Build coverage gradually using thin layers rather than applying a thick coat all at once for a natural finish
- Set foundation with translucent powder in the T-zone and leave the perimeter of your face bare for a seamless blend
Finding the right foundation shade is one of the most frustrating experiences in makeup shopping. You swatch a color on your wrist, it looks perfect under the drugstore lights, but once you get home and apply it to your face, the color is completely wrong. The problem is not the foundation — it is the method. Matching foundation requires understanding two separate factors: your skin's undertone and the formula that works with your skin type.
This guide breaks down both components so you can walk into any store and confidently select a foundation that disappears into your skin. No more orange lines along the jawline, no more ashy finishes, and no more returning bottles after a single use.
Understanding Skin Undertones
Your undertone is the subtle color beneath your skin's surface that determines whether a foundation shade looks natural or off. Unlike your skin tone which can change with sun exposure or seasonal changes, your undertone stays the same throughout your life. There are three categories: warm, cool, and neutral.
Warm undertones have a golden, peachy, or yellow cast beneath the skin. People with warm undertones typically tan easily rather than burn and look best in earthy tones like orange, yellow, olive, and warm red. Cool undertones have pink, red, or bluish hues beneath the surface. They tend to burn before tanning and look best in jewel tones like blue, purple, emerald, and cool pink. Neutral undertones are a balanced mix of warm and cool — neither pink nor yellow dominates — and most colors look harmonious against neutral skin.
Three Ways to Determine Your Undertone at Home
The vein test is the most reliable method. Look at the veins on the inside of your wrist in natural daylight. Blue or purple veins indicate cool undertones. Green veins indicate warm undertones. If you see a mix of both blue and green, you are neutral. Make sure to check in natural light rather than bathroom lighting, which distorts color perception significantly.
The jewelry test is another useful indicator. Hold a silver piece against one side of your face and a gold piece against the other. Observe which metal makes your skin look brighter and healthier. Silver that complements your skin points to cool undertones, while gold that enhances your complexion suggests warm undertones. If both metals look equally flattering, you have neutral undertones that can wear either.
The white paper test involves holding a plain white piece of paper next to your bare face. If your skin looks yellow or golden next to the white, you have warm undertones. If it looks pink or rosy, you have cool undertones. If your skin appears grayish or ashy, you have olive undertones, which is a subtype of neutral that has greenish hues. Olive undertones are more common than most people realize and require specific shade ranges that accommodate green-gray tones.
"The single biggest mistake people make when shade matching is testing on the back of the hand. The hand has different sun exposure and pigmentation than the face. Always swatch along the jawline and check in natural daylight. A perfect match disappears into the skin with no visible border."
Foundation Formulas by Skin Type
Once you know your undertone, the next decision is the formula. The right formula depends on your skin type, the coverage level you want, and the finish you prefer. Using the wrong formula can make your foundation look cakey, cause it to slide off by midday, or emphasize dry patches you did not know you had.
Liquid Foundation
Liquid foundation is the most versatile and widely used formula. It comes in three finish types: matte, satin, and dewy. Matte liquid foundations work best for oily skin because they absorb excess oil and leave a shine-free finish. Satin finishes suit normal and combination skin with a natural look that is not flat or glossy. Dewy or radiant finishes are ideal for dry skin because they add luminosity and hydration. Liquid foundations offer buildable coverage from light to full, making them suitable for all skill levels.
Powder Foundation
Powder foundations are pressed or loose powders that provide light to medium coverage. They are excellent for oily skin because they absorb oil throughout the day and are easy to touch up. Powder foundations apply fastest of all formulas and work well for quick everyday routines. They are less suitable for dry or mature skin because they can settle into fine lines and emphasize dry patches. Apply with a dense kabuki brush using buffing motions for the most natural finish.
Cream Foundation
Cream foundations come in a pan or compact and have a thicker consistency than liquid. They provide medium to full coverage and work exceptionally well for dry and mature skin because the cream base adds moisture and creates a smooth canvas. Cream foundations are also the best choice for covering discoloration, scars, and hyperpigmentation. They require a bit more blending time than liquid formulas. Apply with a damp makeup sponge for the most natural, airbrushed finish.
Stick Foundation
Stick foundations are solid formulas in twist-up tubes that offer full coverage in a single swipe. They are ideal for normal skin that does not have extreme dryness or oiliness. Stick foundations are excellent for travel and touch-ups because they are compact and do not spill. They allow precise application for spot concealing as well as all-over coverage. Blend the edges with a brush or sponge to avoid visible lines.
The table below summarizes which formula suits each skin type and concern.
| Formula | Best For | Coverage | Finish |
|---|---|---|---|
| Liquid Matte | Oily skin | Medium to full | Flat, shine-free |
| Liquid Satin | Normal, combination | Light to medium | Natural, skin-like |
| Liquid Dewy | Dry skin | Light to medium | Radiant, luminous |
| Powder | Oily skin, quick routines | Light to medium | Matte, velvety |
| Cream | Dry, mature, scar coverage | Medium to full | Satin, smooth |
| Stick | Normal skin, travel | Full | Semi-matte |
How to Shade Match Correctly
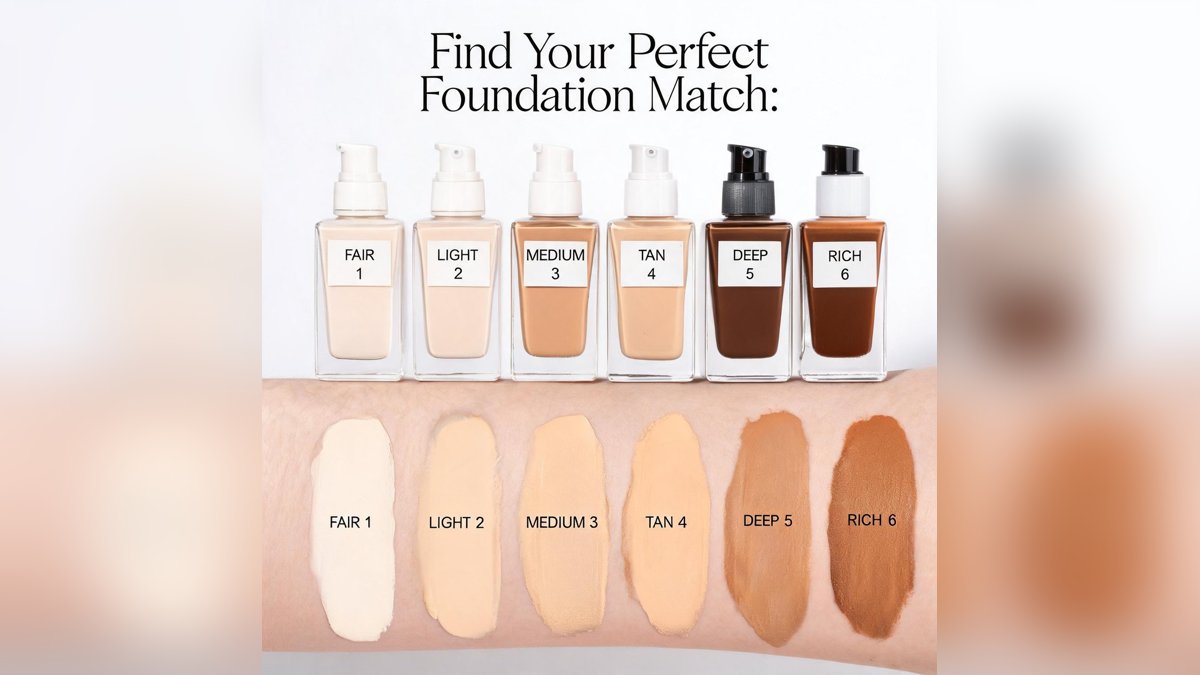
Shade matching is a skill that improves with practice. The golden rule is to match your foundation to your neck and chest rather than your face. Many people match to their face alone, which creates a visible difference between the face and neck, especially in photos. Your face is often slightly lighter than your neck due to sun protection habits and exfoliation, so the neck and chest provide a more consistent reference point.
When testing in a store, swatch three shades that look closest to your skin tone in a vertical line along your jawline, blending each downward toward your neck. Step outside or find a window with natural daylight. The correct shade disappears into your skin without needing blending. Narrow down your options by eliminating the two that are visibly too light or dark, then apply a small amount of the remaining shade to your entire jawline area.
Always let the foundation settle for at least 60 seconds before making a final decision. Most liquid foundations oxidize slightly upon contact with air and skin oils, darkening by half a shade to a full shade within the first minute. If you judge the color immediately after application, you may end up with a shade that turns orange or dark within an hour of wear.
Application Techniques for a Natural Finish
Even the most perfectly matched foundation will look artificial if applied incorrectly. The goal of foundation application is to even out the skin tone while letting your natural skin texture show through. Heavy, mask-like application is the most common mistake that makes foundation look obvious.
Start with well-prepped skin. Cleanse, moisturize, and apply primer suited to your skin type. Silicone-based primers fill pores and create a smooth surface for foundation. Hydrating primers add moisture and are ideal for dry skin. Mattifying primers control oil and extend foundation wear time for oily skin. Let your primer set for two minutes before applying foundation.
Build coverage in thin layers. Apply a small amount of foundation to the center of your face and blend outward toward the hairline and jaw. The center of the face typically needs more coverage, while the edges need less. Use a damp makeup sponge for a sheer, natural finish or a dense brush for more coverage. Blend in downward motions to avoid pushing product into pores and creating a textured look.
Set strategically rather than all over. Apply translucent setting powder only to the T-zone — forehead, nose, and chin — where oil breaks through first. Leave the cheeks, jawline, and perimeter of the face free of powder to maintain the foundation's natural finish. Use a fluffy brush with a small amount of powder and press it into the skin rather than sweeping, which moves the foundation underneath. For more advice on full-face makeup, see our ultimate everyday makeup routine for a fresh, natural look.
Common Foundation Mistakes and Fixes
Even experienced makeup users encounter foundation problems from time to time. Most issues have simple solutions that do not require buying new products.
A cakey or heavy appearance means you are using too much product or the formula is too thick for your skin type. Fix this by sheering out your foundation with a damp sponge and setting with a fine mist of setting spray rather than heavy powder. Foundation that creases in fine lines around the eyes and mouth needs less product in those areas. Apply a lighter layer around the eyes and use a small amount of translucent powder pressed in with a velour puff.
Foundation separating or pilling during the day points to incompatible products underneath. Water-based foundation will separate on top of silicone-based primer, and vice versa. Check your primer and foundation labels — if one contains dimethicone and the other does not, switch to products with matching bases. Foundation that transfers onto clothes and phones has not been properly set. Use a setting spray and translucent powder, then wait three minutes before getting dressed.
If you find that your foundation looks orange after a few hours, the formula is oxidizing on your skin. Switch to an oxidation-resistant formula or use an oil-control primer underneath. Certain sunscreens also cause foundations to oxidize, so try changing your SPF if the problem persists.
Frequently Asked Questions
Common concerns about finding the right foundation shade and formula
Should I test foundation on my jawline or my wrist?
Always test foundation on your jawline, blending downward onto your neck. The wrist does not match the color of your face due to differences in sun exposure and blood flow. The correct shade should disappear into your jawline and seamlessly blend with both your face and neck without a visible line.
How do I know if I have warm, cool, or neutral undertones?
Check the veins on the inside of your wrist in natural light. Blue or purple veins indicate cool undertones, green veins indicate warm undertones, and veins that appear both blue and green suggest neutral undertones. Another test: silver jewelry flatters cool tones while gold jewelry flatters warm tones.
Can I mix two foundation shades to get my perfect match?
Yes, mixing two foundation shades is a common technique used by makeup artists. If your skin tone falls between two shades, purchase both and mix them on the back of your hand before each application. This approach works best when both foundations have the same formula and base ingredients.
Why does foundation look orange on my skin after a few hours?
Oxidation causes foundation to turn orange when the pigments react with oxygen in the air and oils on your skin. This is more common with liquid foundations containing iron oxides. To prevent oxidation, use a mattifying primer, choose formulas labeled as oxidation-resistant, and set your foundation with a matching powder.
How often should I replace liquid foundation?
Liquid foundation should be replaced every 6 to 12 months. Pump bottles last longer because the formula is not exposed to air and bacteria each time you use it. If you notice a change in smell, texture, or separation, replace it immediately regardless of how long you have had it.
Related Articles
Your Next Step
Start by determining your undertone using the vein test in natural daylight. Write down whether you are warm, cool, or neutral before you shop. When you test foundations, always swatch along the jawline, wait 60 seconds for oxidation, and check in natural light. Choose your formula based on your skin type — liquid for versatility, powder for oil control, cream for dry skin, or stick for convenience and travel.
A well-matched foundation should feel like nothing on your skin. If you can see it or feel it, the shade or formula needs adjustment. Once you master the basics of foundation matching, explore eye makeup for beginners with step-by-step guidance and contouring and highlighting tips for your face shape to complete your makeup routine.